Xero gets electronic copies of your bank statement data directly from the bank in the form of “Bank Feeds”.
Getting this data digitally creates one of the big time savings in Xero – neither of us has to enter this information into Xero by hand.
One of the tricks with Bank Feeds though is that we can only access data through them going forwards in time. We can’t access any bank transaction information before your Bank Feed was activated. This means past data either has to be entered by hand or the data is sourced from internet banking.
This is is why we may ask for your help – because only you have access to your online banking history.
Unfortunately, all the different banks have different methods for getting your transaction data out of internet banking. The guide below should help you do this if you belong to the major NZ banks.
HOW TO DO IT
Each bank differs slightly so after the more generic instructions (which should help with most banks, not just these four) there are screenshots for each of the major banks that will show you exactly what you are looking for.
HOW TO GET CSV FILES FROM YOUR BANK:
- Log into your online banking
- Select the account you want to download a CSV for
- Find a “view statements” or “view transaction history” or similar tab and click on it
- Insert the date range we have asked you for
- Make sure you select the CSV option as the “Output” or “Format”
- Click “Export”, “Save” or “Download” and the file will be saved to wherever your computer usually saves files
- Send it to us.
If you still have problems give us a ring to arrange some more hands on help – you can come to us or we can come to you.
BNZ
Under ‘Balances and Reporting’ select “Export”
Select Account that requires Exporting
Select Export, Top Right of page
Under ‘Balances and Reporting’ select “Export”
Under ‘Balances and Reporting’ select “Export”
WESTPAC PERSONAL
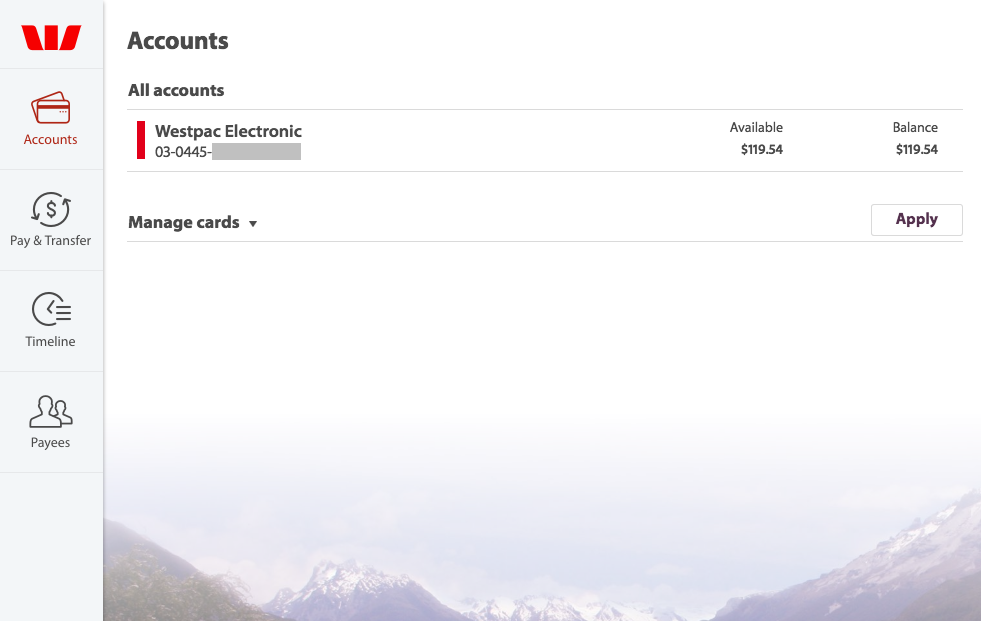
Click on the account you want want to generate a CSV for.
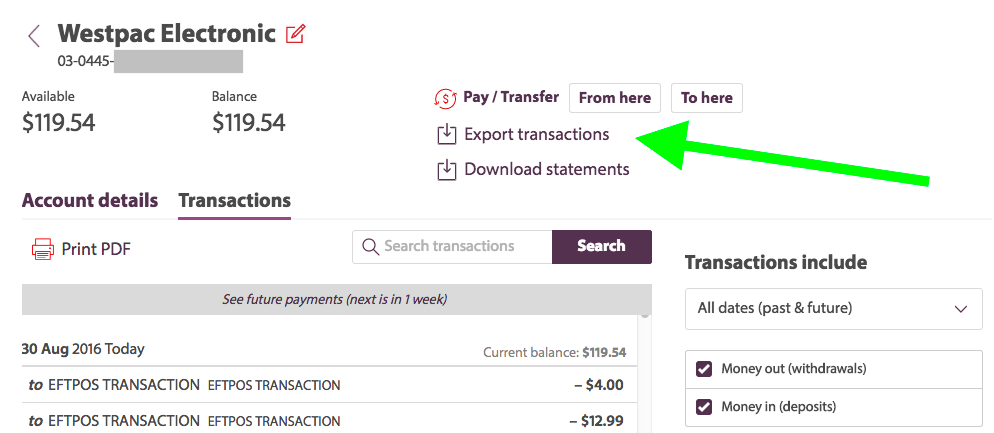
Click “Export Transactions”
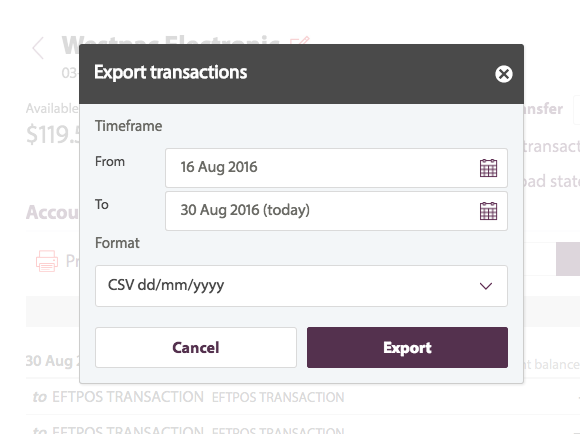
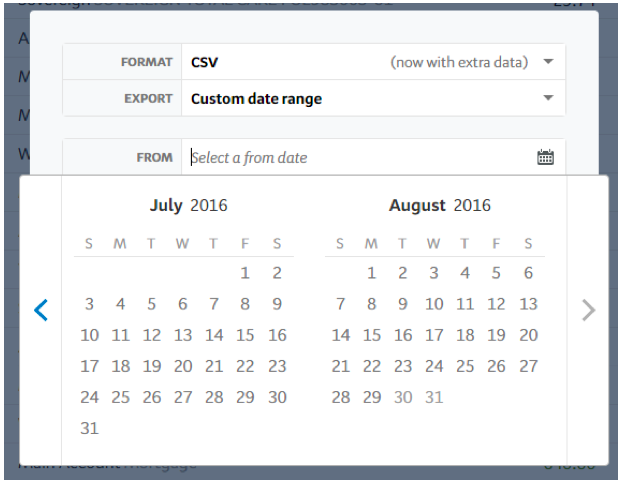
Select the date range required and ‘CSV dd/mm/yyyy’ format
WESTPAC BUSINESS ONLINE
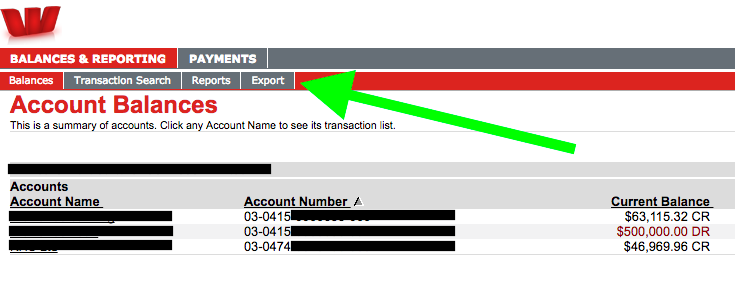
Under ‘Balances and Reporting’ select “Export”
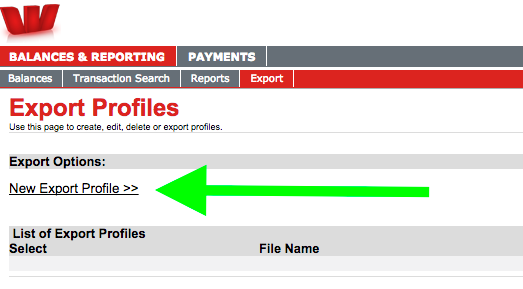
Create a “New Export Profile”
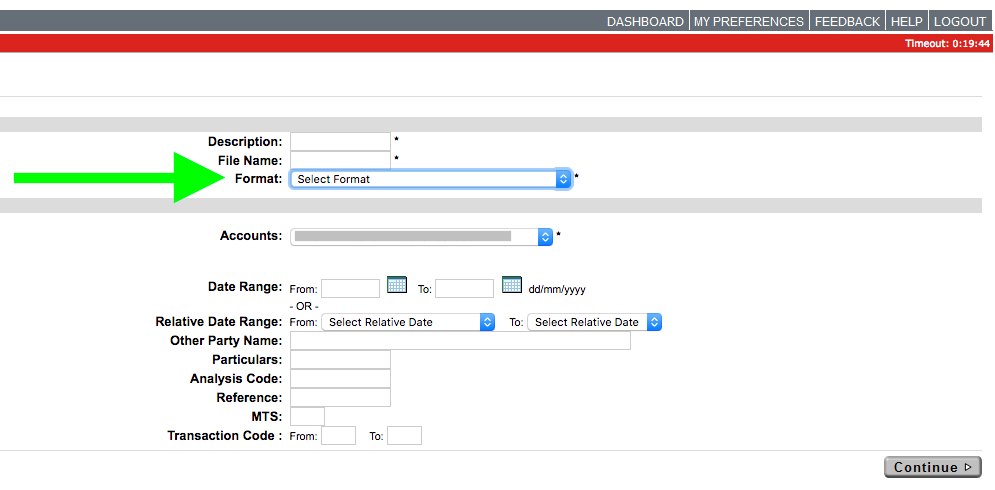
Name the profile, the file to be generated (unimportant really), and select the format ‘CSV dd/mm/yyyy’.
Then select the relevant account and date range.
Click “Continue” and “Confirm” on the next page.
KIWIBANK
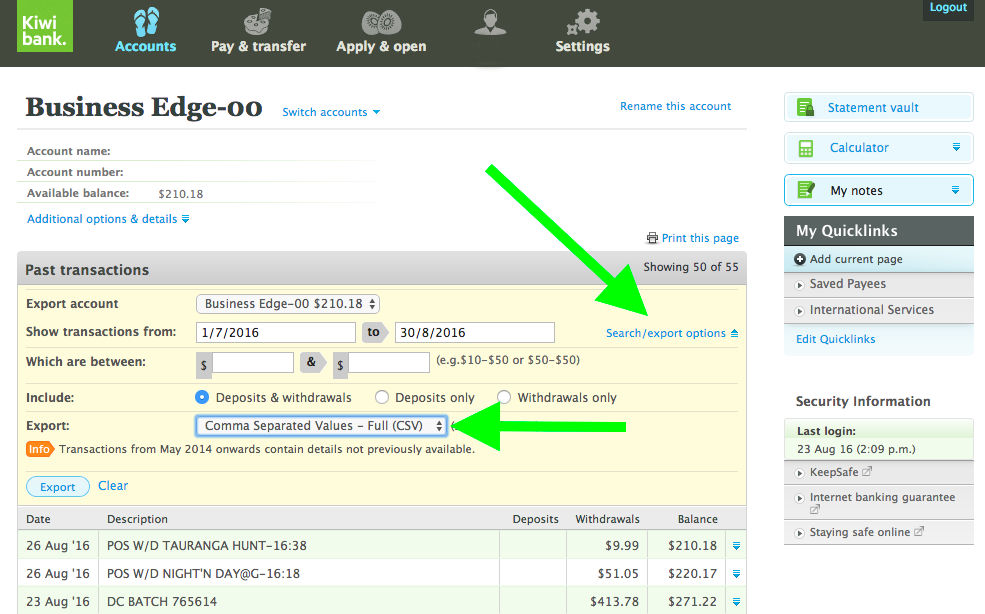
Under ‘Accounts’ look for the “Search/export options” button. Click this to dropdown the export options. Export a “Full CSV”
BNZ
Select Account that requires Exporting
Select Export, Top Right of page

Select CSV format for export
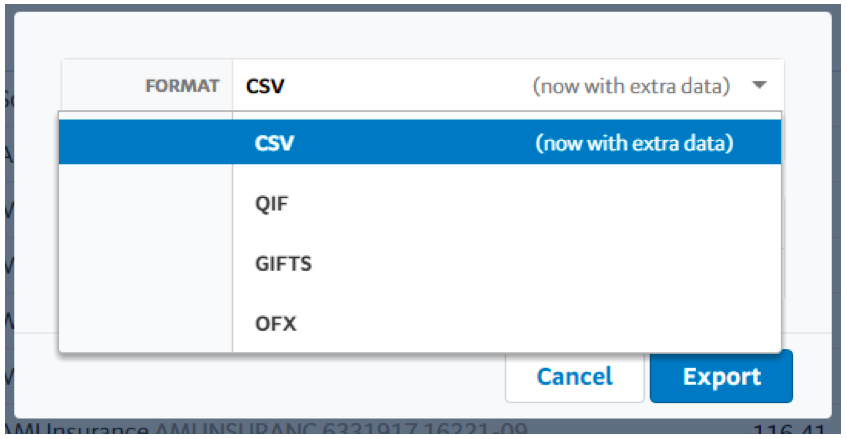
Select the date range for the transactions required
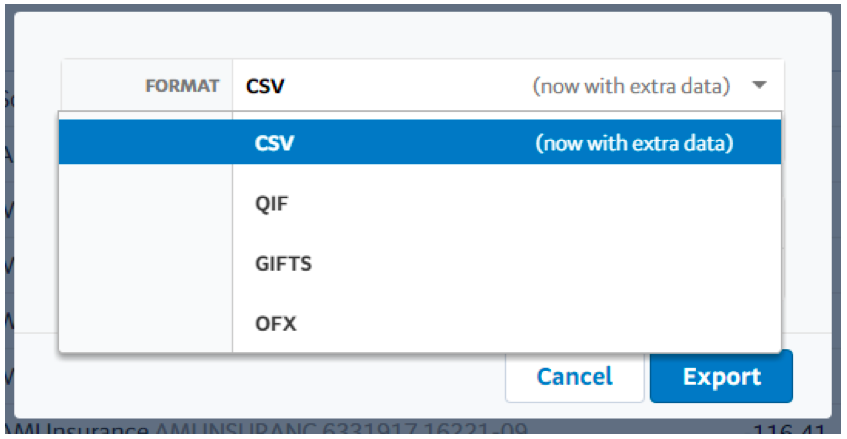
Review selected options and if this is correct then press “Export”
ASB
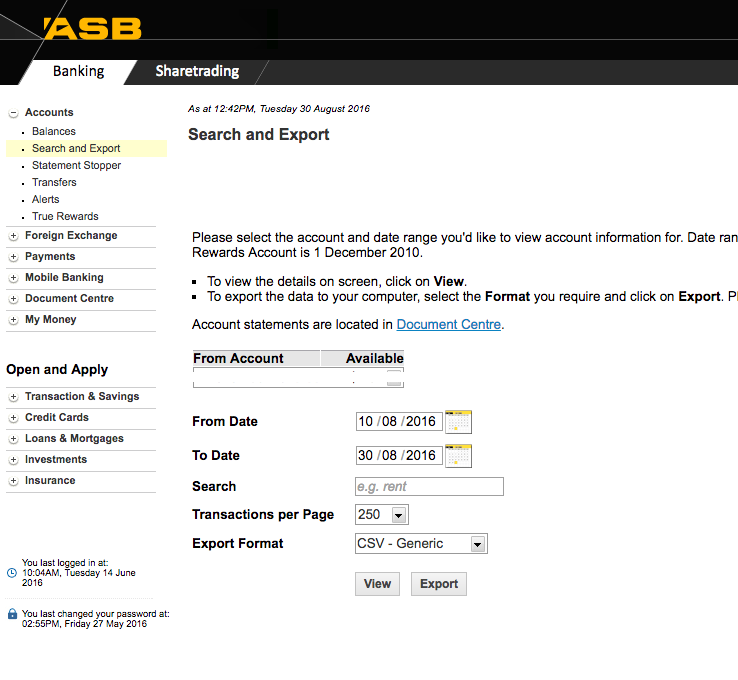
Under accounts select “Search and Export”
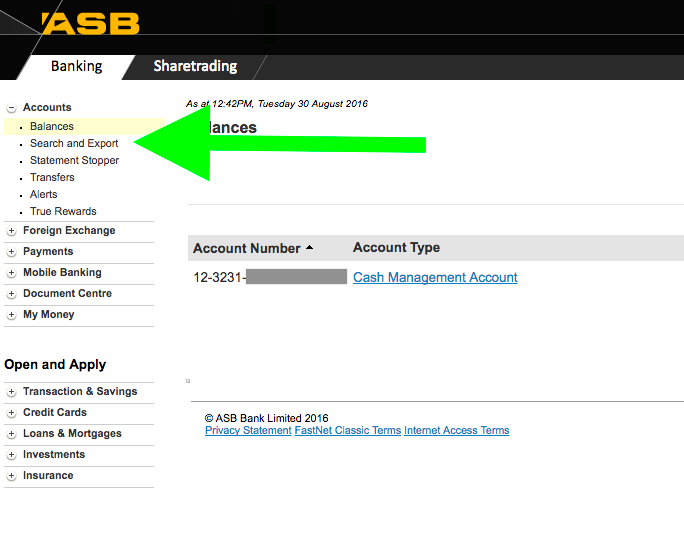
Select the desired account, the date range for required transactions and ‘CSV – Generic’ format for export
